originally posted on 5/2/15 on malaker.32hertz.com
Hello, My name is Ed Malaker and I am from Carbondale Pa, USA, and today I want to tell you how to create a new project in Cakewalk Music Creator 6.
1. The first thing you will need to do do is set a proper project name and location. When you first open Cakewalk Music Creator you see something like this: (click on any image to make it larger)
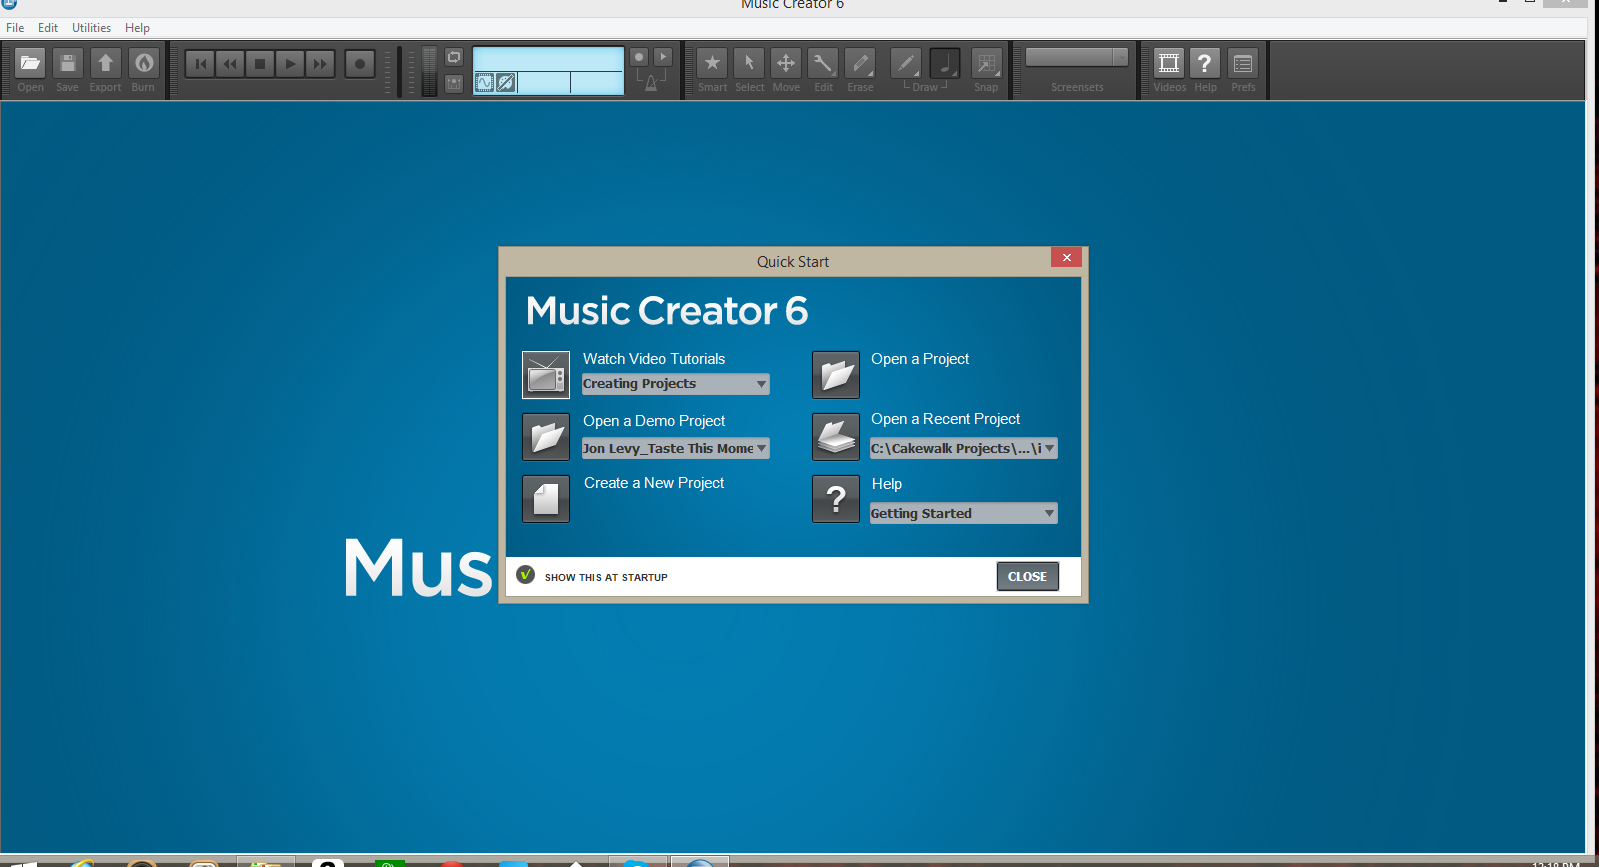
On this page you will want to click on “Create A New Project”. When you do you will see this:

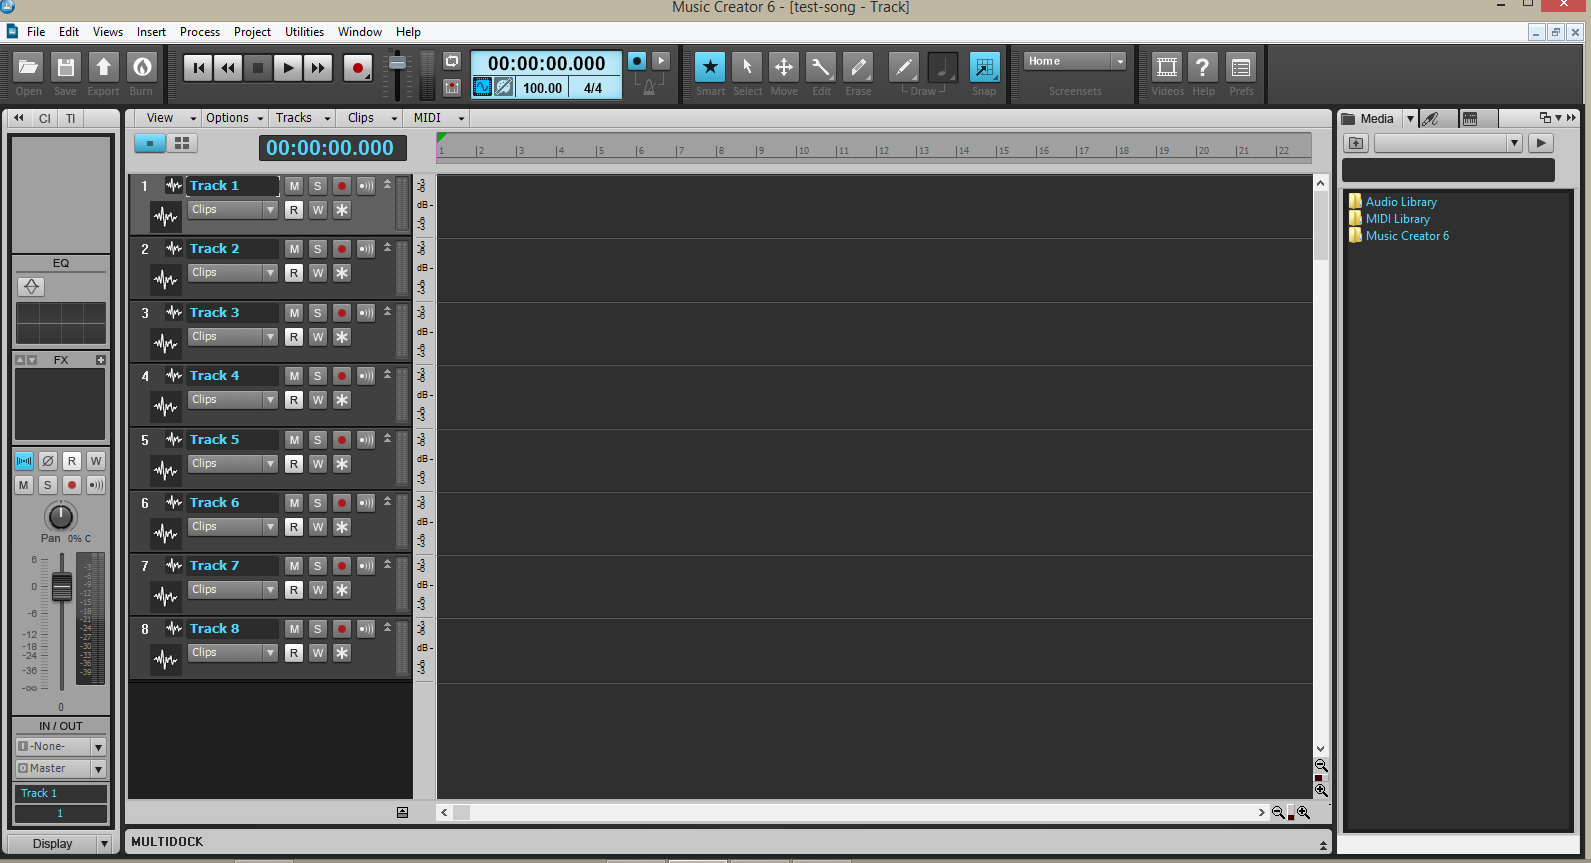
On this page you will select a name for your project. This is very important because if you write a lot of songs things can get confusing if everything is named “new_song_1”, “new_song_2”, etc.. If you have no title then I recommend the date, such as “new_song_5-2-15”, at least this gives you a time-frame. Please remember that the computer does not like spaces in titles. Do not use “new song”, instead use “new_song”, or “new-song”, or even “newSong”.
I recommend leaving the project in its default location. I used to try to move them to where I thought would be better but things get lost, confused, and forgotten, way too easily. In default, everything is in one place. I leave the other setting as default also. That gives me this:
2. Now we need to set digital audio preferences. That means our Sample Rate and our Bit Depth. To do this go to the top menu bar and select EDIT then select PREFERENCES. You will see something like this:
On the left panel select “Advanced” to see this:
Here you can set your Sample Rate to the recommended 48,000, and the and the Bit Depth to the recommended 24.
3. Set Recording File type. Cakewalk Music Creator 6 records in WAV format which is acceptable. You can export using Broadcast WAV format (recommended) by going to the top menu bar and selecting EDIT then select PREFERENCES. You will once again see something like this:
Select “Audio Data” from the left menu bar and you will see this:
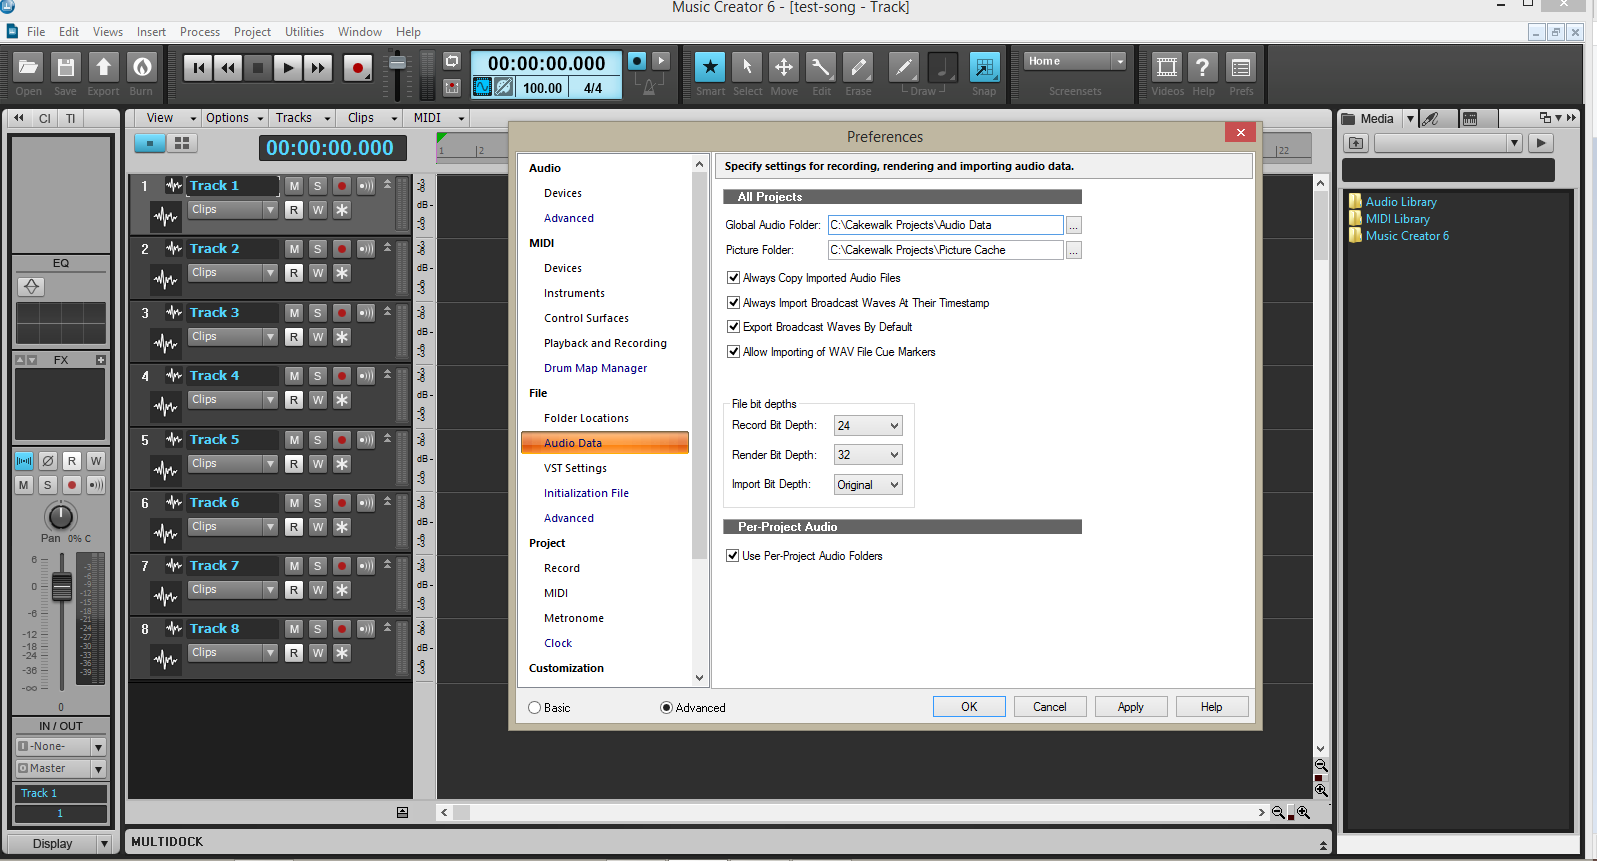
On this page, you can check the box to export Broadcast Waves by Default.
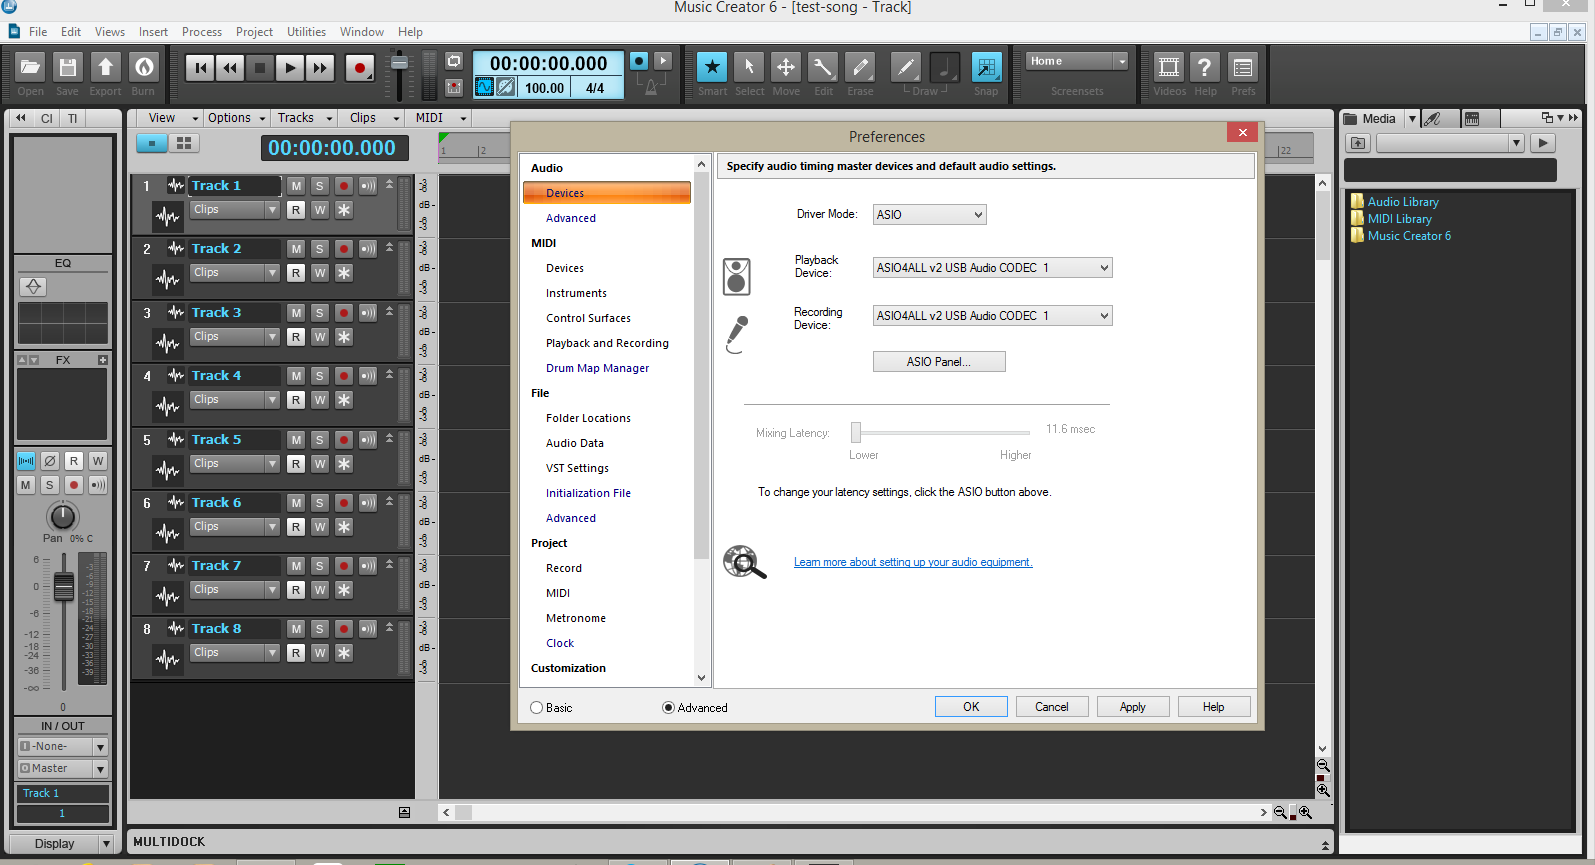
4. Set Hardware Settings. To make sure your hardware settings are correct, once again go to the top menu bar and select EDIT then select PREFERENCES. You will see something like this:
On this page make sure your recording and playback devices are correct. I use asio4all and that is why you see those settings, your settings may be different.
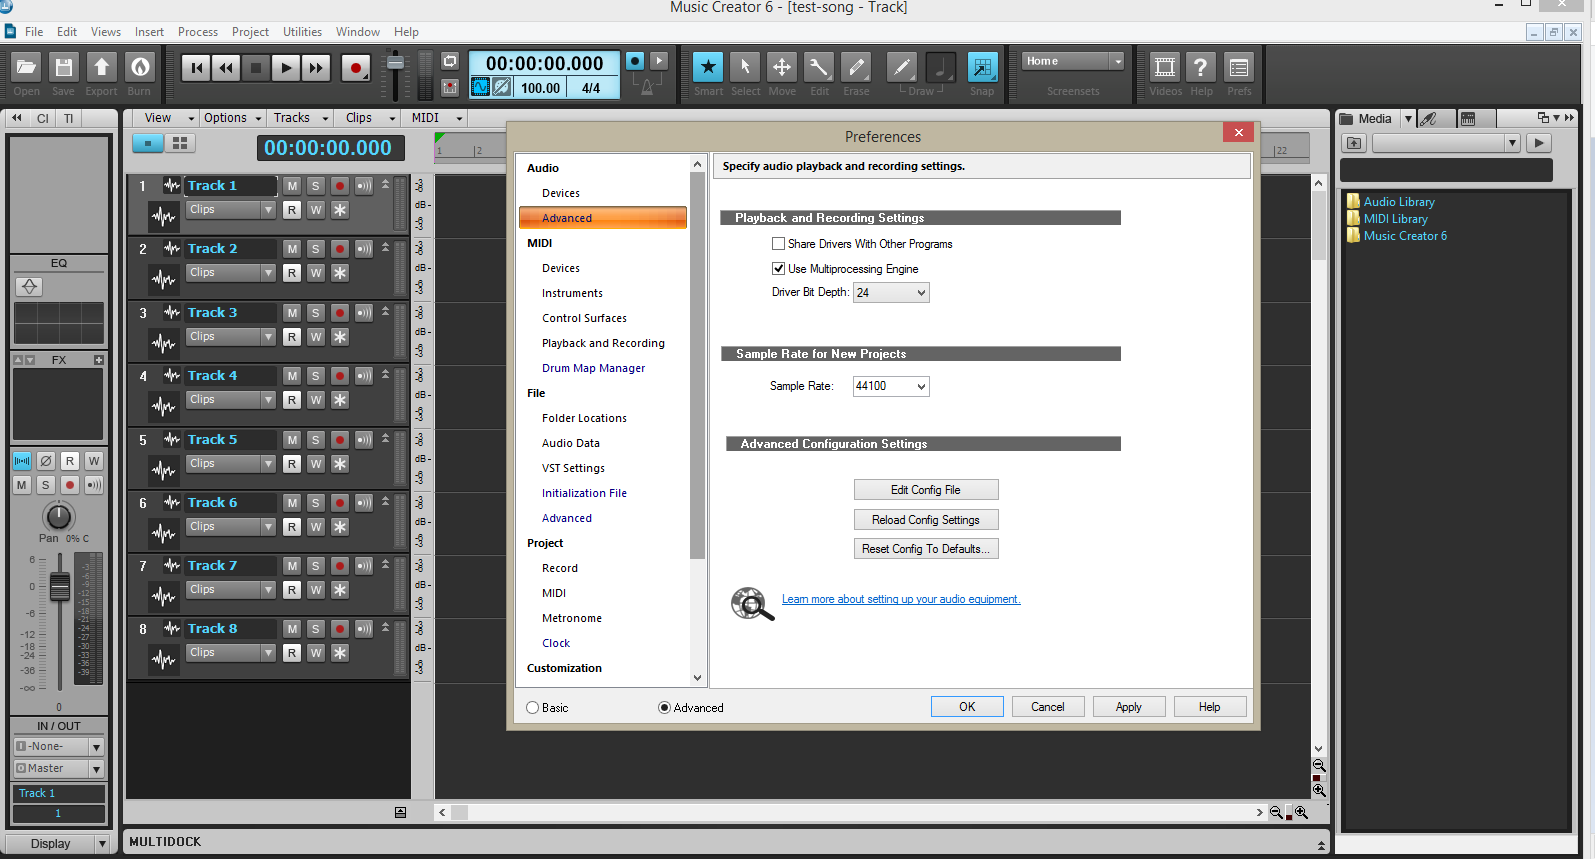
5. Set the Buffer Size. From the page you are on if you select “Playback and Recording” on the left menu you will see something like this:

On this page, you can set the buffer size. It is recommended to start at 128 and increase as needed.
With these settings finished you are ready to begin recording your new project. I hope that this was helpful and informative. Have a great day and check out my blog at http://32hertz.com ad get free song reviews at http://getmysongreviewed.com.
Thank you and have a great day!
Ed Malaker