The SI-Drum Kit is a very good sounding entry-level electronic drum machine that is fun and easy to use.
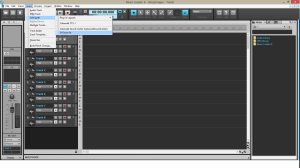
To insert the SI-Drum Kit into your Cakewalk project at the top of the page go to Insert/Soft Synth/SI-Drum Kit at the top of the page.
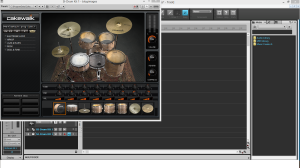
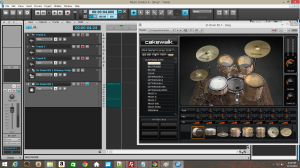
I clicked OK on the pop up to accept the defaults and it brings me to a screen that looks like this:
You can see that it not only brought up the drum set but also added 2 tracks to my project, track 9 and track 10. We will talk more about those later.
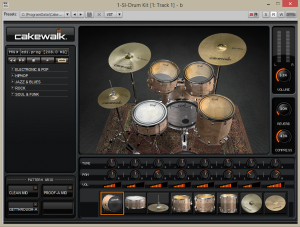
You should be able to click on the drums in the drum set and hear them. You should also be able to click on the individual drums below the drum set and hear those as well. Notice that if you click the bottom of the drum image you get a softer sound and on the top of the image is a louder sound (works on the drum set as well).
Tune, pitch, and volume are self-explanatory as are reverb and compression. These are really helpful controls that allow you to adjust the drum sounds to fit your needs.
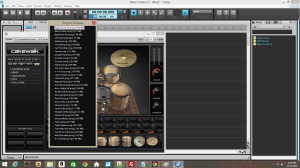
On the left side of the drums you see it says “default prog” you can click this to bring up a menu of other drum sets that you can use, there are many sets to choose from. On my system, the menu did not have a scroll bar causing me to need to manually change the size of the menu window to see all of the different sets.
Earlier I was telling you that you could adjust the sounds of your kit. If you create a kit that is just how you want it you can save it by clicking the “prg” button that is right next to the “default prog” button and choosing the “save program as” option. Be careful not to accidentally save over the default drum kit as I did by choosing “save program” instead of “save program as”.
Directly below this, you see pretty playback controls.
Directly below the playback controls, you see a list of drum styles with a + next to them. Click the + to see the pre-programmed beats that make up the style you have chosen. Double-clicking a beat will start it playing. If you have the loop option selected in the playback controls the beat will play indefinitely.
These drums will play at the tempo of the Cakewalk project.
If you have a project loaded with some tracks and you find a few drum beats that go with the music you might find it helpful to use the pattern and grid section below the drum beats. Simply drag the name of the drumbeat you like into one of the 4 boxes and put other beats in the other boxes. Now as the song plays just click the box with the beat you want and it will immediately change to that beat, even in the middle of a measure. This is a great and really fast way to work out a drum track or for using them in a live setting.
Now about those 2 tracks, we created in our project.
The first track (in this example track 9) you’ll notice has a little icon with what looks like a midi plug and a keyboard on it also if you grab and enlarge the name you will see its name is “SI-Drum Kit 1 Primary Output: Stereo”.
The second track (in this example track 10) has an icon with just the midi plug symbol and it is named “SI-Drum Kit 1”. This is where you want to drag your drum beats, just like you did in the pattern and grid section. Now you can loop it like your other track and edit it in piano roll etc. and that is pretty much all there is to it. From here it is all creativity!
Thanks for reading and please check out my website getmysongreviewed.com get free song reviews by doing simple survey style reviews of other songs.
