first posted on 5/26/2015 on malaker.32hertz.com
Hello my name is Ed Malaker. Today I want to talk about configuring an EQ plugin to function like a Rupert Neve Designs 551 500 Series Inductor EQ


Rupert Neve is the creator of the Neve Recording Consoles, which are very highly regarded consoles. It makes sense that this company knows what’s important when it comes to recording, so trying to mimic their hardware with your software is probably a good place to start. Especially if you’re not really sure how to get started.
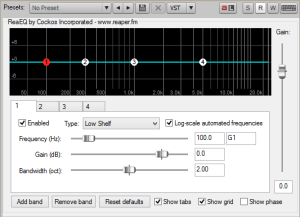
I use the free plugin REAEQ from the makers of Reaper DAW. It looks like this (click to make it bigger):

So lets get started:
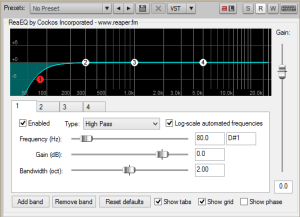
We see the Rupert Neve EQ has a push button high pass filter set at 80hz. So I set band one on my plugin to 80hz and change “type” to Highpass.
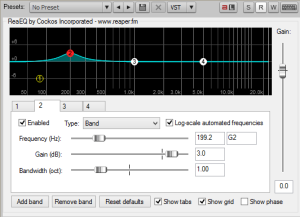
 Next, we see the Rupert Neve EQ has a switchable (bell curve/shelf), sweepable (35hz-220hz), low frequency controller. To do that in our plugin we will set band 2 to a frequency between 35 and 220 for now, but know that we can move it anywhere between those numbers at any time. Also, I will set mine to a bell curve (band on this plugin) for now, but know that you can also switch it to shelf curve at any time. I also set the Q (bandwidth in this plugin at 1).
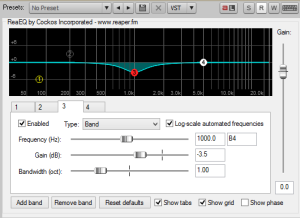
 Next, we see the Rupert Neve EQ has a switchable (high q), sweepable (200hz-6000hz) mid range controller. To do that in our plugin we will set band 3 to a frequency between 220 and 6000 for now, but know that we can move it anywhere between those numbers at any time. Also, I will set mine to a bell curve (band on this plugin) for now, but know that you can also switch it to notch curve at any time to get rid of problem frequencies. I also set the Q (bandwidth in this plugin at 1).
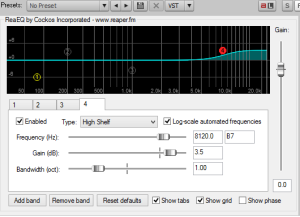
 Last, we have the high frequency controller. It is switchable between the frequencies 8k and 16k, and switchable between bell curve and shelf curve. To do this in our plugin we set band 4 to either 8k or 16k, knowing at any time we can choose the other. Then we set it for bell or shelf curve, knowing at any time we can choose the other. I also set the Q (bandwidth in this plugin at 1).

That is all there is. To save this as a plugin just click vst at the top of the plugin, choose save preset, and give it a name. Next time you need it click vst, and choose load preset.
You now have a plugin that tries to emulate the Rupert Neve model. It is important to realize that the electronics inside the Neve have a lot to do with the sound they produce, just as the code in your plugin affects the sound it creates.
I hope you found this interesting and helpful.
Have a great day!
Ed Malaker
